I was just over reading Crazy Aunt Purl's blog and she had a problem with a scarf she's knitting and was thinking about frogging part of it. She's using Knit Picks new Harmony straight needles and loves them.
Oh, and she's giving away sets of the new Harmony straights, so get on over there and ask for a set!
Do it now!
There was a suggestion about using a life line in the future for just such disasters. Here's part of what I wrote:
If you use the Knit Picks Options (interchangeable) Harmony (or nickel plated) needles, there's a small hole at the end of the cable part (used to tighten the cable/needle tip combination). Thread a piece of dental floss through it and tie it on. Use a bow or half bow, so you can untie it easily. Then knit your row, and you have a perfectly placed life line to rip back to if you need to do it in the future. At the end of the row, untie the floss from the needle, and cut the other end leaving a bit extra on each side so it doesn't slide out of the end stitches.
I suggested dental floss because it's sturdy, slides easily, comes in an easy dispenser with a cutter (for once the floss is through the row) and the dispenser closes up so it doesn't interfere with anything else in your knitting bag. AND, if you fly, they probably won't be upset about you carrying the cutter in the floss case, but you'll have something that will cut yarn.
Then again, there's always the solution of calling it a "design feature."
Then I started thinking that I love the interchangeable needles so much that I plan to buy a set of the nickel plated ones. Maybe the Harmony ones, too. So far, I have one set of needle tips in size 8 and several different length cables. And I thought you might be interested in all the things you can do with the interchangeable needles that you can't do with the others. So, here is a list of all the wonderful things you can do with Knit Picks interchangeable needles.
I'm challenging myself to make it a "top TEN" list. Let's see if I can think of that many.
1. Use a lifeline--described above.
2. Make knitting circularly easier--Ever knit circularly, and all the stitches pile up behind the left-hand needle and don't want to slide onto it? Put a needle tip that's a size smaller on the left-hand side, and your stitches will glide onto the let tip easily. Well, more easily than they did before. If you are a very tight knitter, you might be happier with a tip on the left that's two sizes smaller. Try this out for yourself. It won't change the gauge, as long as the right hand needle is the right size. Unless you're like my friend Madeline, who knits in either direction equally easily.
3. Make your stockinet stitch even--Even Elizabeth Zimmerman had trouble making stockinet stitch that was even. I think her purl rows were looser than her knit rows. Lots of people have this problem. If you're doing this flat (not knitting circularly), which is the only place it matters, go down a size on the needle tip that you knit the looser row with. This should compensate, and you should have marvelously even knitting.
4. Make your own condo needles--Condo needles are novelty needles that are used to knit flat in a way that will make unusual patterns with every other row a different tension than the intermediate ones. You can make an interesting scarf in garter stitch using one needle tip that's the right size for your yarn, and another tip that's much bigger. You'll have alternating rows of normal knitting and stitches with very long, lacy loops. You can do this by using two different size straight needles, too, but some of us really like circulars.
5. Make frogging easy--Just take one of the needle tips off, and your stitches will just slide off the needle almost by themselves!
6. Easy frogging part 2--Before you slide all those stitches off the needle, Put a tip two or three sizes smaller than you're using on a cable (and a stopper on the other end) and run it through a row of stitches back where you want to stop. Then pull out the needle you were knitting with (see above) and let 'er rip! Use the correct size needle to tink back one row to check all the stitches and make sure you haven't dropped one and to ensure that the stitch mount is correct for each stitch. If you're ready to tink and you find you've put the needle tip on the wrong end, just put one on the other end to tink from. In effect, you're creating your own life line.
7. Change cable lengths--This should be pretty self-evident, but it has been really wonderful while knitting my Celtic sweater that I could change cable lengths as knitting progressed by taking a tip off the needle in use, replacing it with a stopper and putting that tip and a stopper on the new cable, and then just knitting onto the new cable with tip.
8. Create your own stitch holders--If you need to use the size tips you're using in your project on a different project, just take them off the cable and replace with stoppers. For two dollars, you can get a set of size tags from Knit Picks to put on your cable so that you'll remember what size tips you were using when you go back to the project. This was particularly helpful for me on the Celtic sweater. I put pockets in the front that slant, and that meant (since I was doing it in one piece) that there were three sections: the pocket opening on the right front, one on the left front, and the pocket lining and back, each on a separate cable. I could switch back and forth between them by just changing which cable had needle tips on it.
9. Pick up stitches easily--This will require a little work and craft on your part, but you can take a Harmony tip and whittle or file a notch in it to make a crochet hook for picking up stitches. Pick up the stitches using the hook and just change to a knitting needle tip and start knitting. Loads of knitters have implored Knit Picks to make a crochet hook tip for their interchangeables, and rumor has it that they may do that. They promised me that they are are considering the idea. In the meantime, you can make your own using a nail file, triangular needle file or Dremel tool. Once you've got the shape, polish with nail buffing equipment or a buffing wheel on the Dremel. I saw one that somebody made with a Dremel, and she filed off the point, too, but I think I'd rather leave the point on. Then I could use it more like a knitting needle, but it would be easier to pull the stitches through than using a knitting needle tip.
10. Add shaping to your knitting--Want to knit that sweater body straight, without having to resort to shaping, but it needs to be bigger on the bottom for fitting ease? If working top down, when you get near the waist, just switch the tips to the next larger size, and then possibly switch to the next larger size further down. If working from the bottom up, do it in reverse (switch to smaller needles). The interchangeable tips also make it easy to switch from one size for a rib edging to the other size for the body of the sweater or sleeve.
Wow! I actually made it to ten! I could do more if they're interested in taking my advice on other things that would be helpful, such as a connector. With a connector, you could just unfasten a tip, add the connector, and the size cable you're switching to, pull it through, and transfer the tips to the new cable. Well, I've suggested it. We'll see.
As wonderful as the Options needles are, some people have difficulties with fastening the joins properly. Here's what I do:
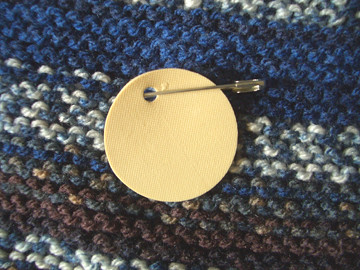
I bought a small, flat circle of rubber called a needle puller in a fabric store. They come in sets of three for almost nothing. I used a paper punch with a small diameter to punch a hole in it. Then I use a large, coiless safety pin to pin it to my knitting.
When I need to switch needle tips, I can use the safety pin instead of the tightening key they provide (which always gets lost even though the loop on the end is a good idea for fastening it to something) and use the rubber to hold the needle tip so it doesn't slip. Don't use excessive force while doing this. I'm sure that you could strip the threads if you work at it.
Here's what it looks like pinned to my knitting:
You can buy coiless safety pins and little rubber grippers in my Amazon store.
***************************
Speaking of my Celtic sweater, I really don't like the set-in sleeves at all. I had originally planned to use dropped shoulders like they did in the Middle Ages, and like I did on my blue coat. The shoulder and sleeve fit beautifully, and it was a dream to knit.
In contrast, the set-in sleeves are impossible to knit without holes in the knitting from the short rows, or disruption of the reverse stockinet stitch pattern. Yes, I can wrap stitches to eliminate holes. And it looks fine on the knit side, which is inside the sleeve. On the outside (where it shows), it looks messy. And the result is making me remember why I hated set-in sleeves from the standpoint of wearing them. The dropped shoulder from the blue coat is stylish, comfortable, and fits my shoulder and upper arm beautifully.
I'm thinking seriously of frogging it.
If I do that, though, I'll have to frog everything back to the shoulders in order to redo them.
Actually, I've been trying to convince myself that it'll be fun to reknit the whole thing (except for the hood and part of the shoulders).
At any rate, I'm going to complete (or nearly complete) the sleeve before I decide.
The lower arm is working out nicely. Here's a photo.

When I get to where the two ribs meet at the bottom, instead of closing it off, I'll cross them, and they'll come off the surface and become I-cord at that point. I'll knit a row of picot holes every few stitches below, and thread the I-cord through it. Then I can knot it and leave the bottom of the sleeve full, or pull the I-cord tight and tie it in a bow for a more closed sleeve at the wrist.
Ripping it all out and redoing it will be fun! Really, it will. I'll keep telling myself that.
*******************************
Oh, I got a comment about the photo yesterday and why it's for my daughter, Holly. Here's why I said that.
When Holly was about four years old, the ice cream truck came around one day. I gave her some money, and she came in a few minutes later with a green popsicle in her hand and said "Look at my tongue!" sticking out her green tongue. My sister and I said, precisely together "Ooooh, it's purple with pink polka dots!" If we hadn't said it in perfect unison, she never would have believed us.
She got a stricken expression on her face and ran into the bathroom and pulled up a stool so she could see into the mirror.
Of course, she realized that her tongue was green, just like she expected, but we really got her on that one. Hence, the dedication to her.
**************************
Don't forget to vote for your favorite Steve Canyon cover, if you haven't already! We have nearly 150 votes so far!
**************************
There are just the usual things on TV tonight. Enjoy!
And have a great evening!


johann you rock!!!!! i cant wait for a set!!! *drools* leah
ReplyDelete